
|
|
|
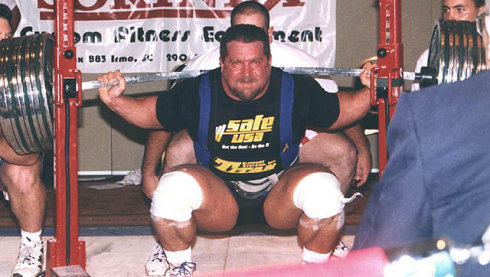
 I recently evaluated a patient who came into the clinic with the self- diagnosis of right hip pain. When I asked him where his hip hurt, he pointed to the back of his hip joint, just lateral to his sacroiliac joint. Upon further subjective history, he stated the current pain was very similar to his left hip pain that forced him to have a hip replacement 3 years prior. Needless to say, he was worried his current hip pain would lead to another hip replacement in the future. During the objective examination, I found this patient to have decreased hip flexion, internal rotation, and extension. While he had limitations in joint mobility, general hip quadrant and scour testing was negative. Looking at regional joints, the patient reported exquisite tenderness to palpation with PA assessment from L4-S1. Additionally he experienced pain with end range lumbar flexion and right rotation as well as various core stability tests. Most notably, his primary report of hip pain was reproduced during the lumbar cardinal plane testing. Since this gentleman had both hip and lumbar impairments, where was the BEST place to start? Initiate Treatment at the Hip or Low Back?During any hip examination, I always assess the lumbar spine. Since these body regions are connected via the pelvis, pain or symptoms in one region can directly impact the other. Additionally, I always use the patient's location of symptoms and mechanism of injury to help guide my diagnosis. As a general rule, if the patient reports that their pain is located anteriorly, symptoms are likely coming from the hip joint. From a movement perspective, less motion exists in hip flexion, adduction, and internal rotation, which places the anterior hip joint in a compromised position if pathology, such as hip OA or FAI, is present. If the patient reports their pain is located posteriorly, symptoms are likely coming from the low back region. Both the lumbar facet joints and regional nerves often refer posteriorly. While the L1-2 dermatomes can refer to the anterior hip joint, these nerve roots are less often irritated, which decreases the likelihood that the spine is causing anterior hip pain. There are always exceptions to this rule, but it is a great starting point to help guide your treatment selection. 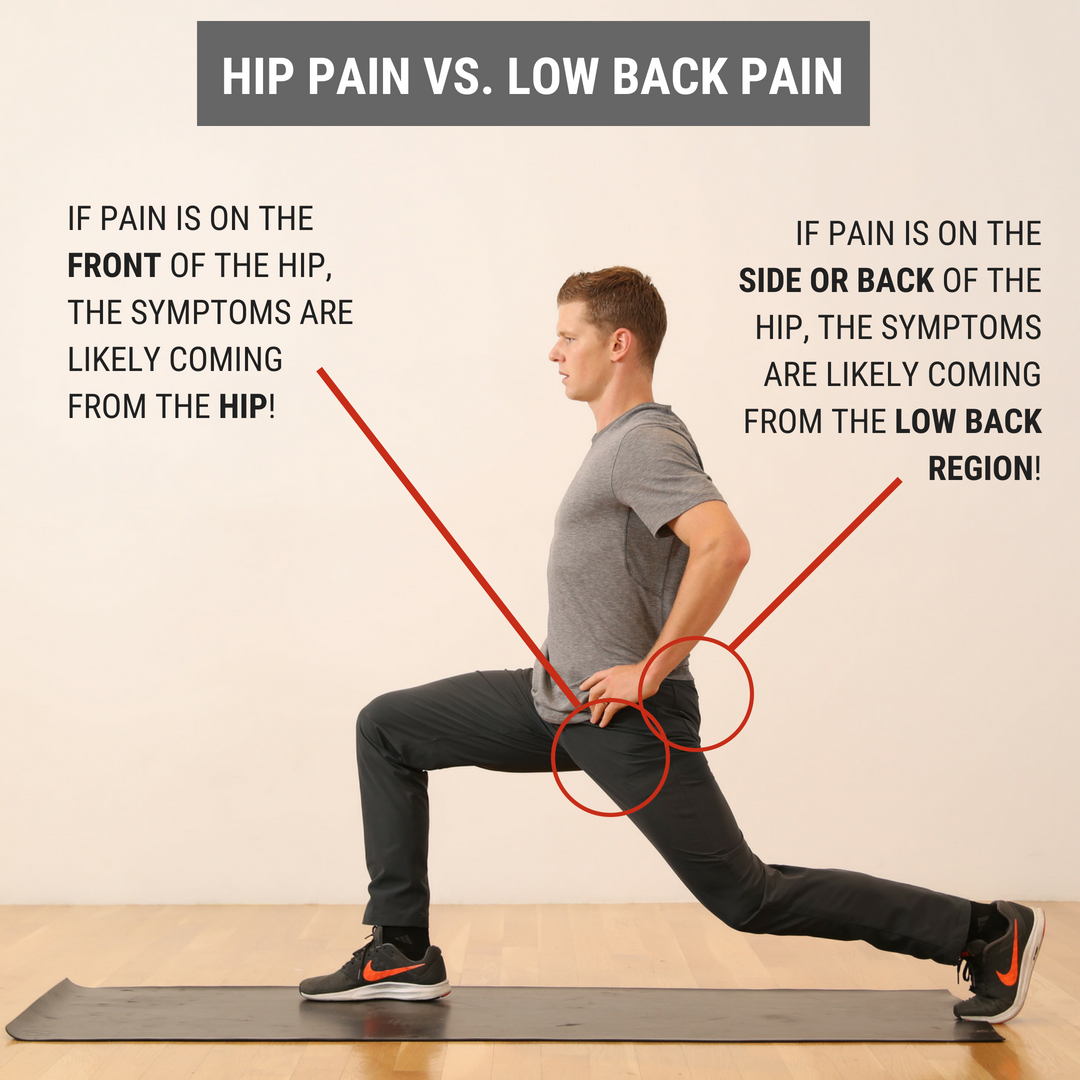 What Did I Do with My Patient on Day 1? Since his pain was reproduced with low back cardinal plane testing, I focused FIRST on the lumbar spine, then SECOND on the hip joint. During the initial visit, I did Trigger Point Dry Needling at the L4-5 multifidus and gluteal muscles. Then, I performed L5-S1 joint PA mobilizations to improve lumbar mobility and a hip long axis distraction manipulation. For his exercise prescription, he was given quadruped hand to heel rocks & repeated supine hip internal rotations. These both focused on improving mobility in general and desensitizing the patients pain.
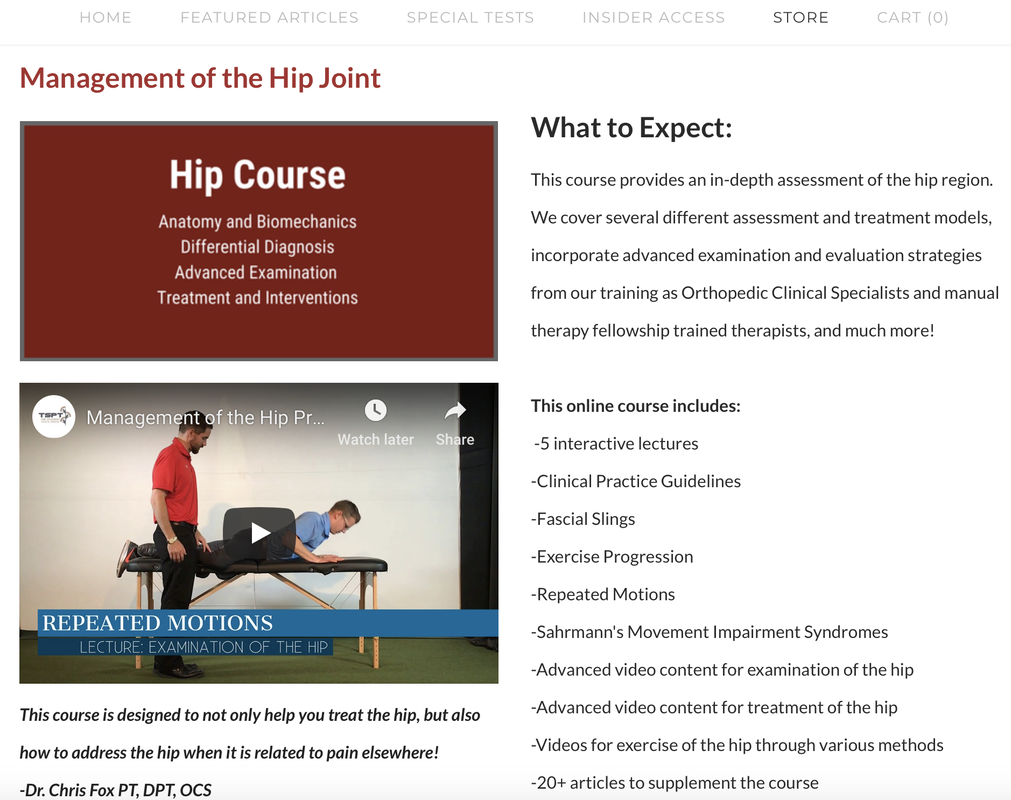
Interested in learning more about the hip?
1 Comment
 “An estimated 1.6 to 3.8 million sports-related mild tramatic brain injuries (mTBI), also commonly referred to as concussions, occur each year in the United States.” The research on concussions has grown exponentially in the last decade. With better information, sports medicine professionals have been equipped with diagnosis and treatment of concussions. While it was once thought that complete rest for 7-10 days would clear up a concussion, we now know that some individuals sustain symptoms longer. We also have learned tools to better handle the post concussive symptoms and assist with treating these athletes. While concussions are typically not seen in the clinic, in team sports they are much more common. I’ve been fortunate to be side by side with athletic trainers on the field and basketball court for over 600 hours learning about concussions and other acute injuries. During this time I was lucky enough to see the many faces of a concussed athlete. Symptoms such as inability to articulate words, difficulty with memory, and a rash of different emotions were just a few of the symptoms that have stuck with me from some of the concussed athletes I helped off the field/court. Learning to recognize these symptoms was one challenge, but treating them post-concussion was a whole different. Treatment for concussions ranges. We know that intense exercise too soon can be detrimental to a post concussed athlete. Exercises targeting balance and proprioception are a must. Starting athletes out with simple balancing and progressing to ball tossing is a good start. Working on multi-directional lunge patterns or step-ups can be effective for neuromuscular control. Furthermore, dual tasking can be implemented to help with the cognitive function of a post concussed athlete. Dual tasking also serves the purpose of improving athlete performance as athletics often requires the combination of motor tasks and cognitive functions. Working an athlete in balance with a ball toss and reciting numbers or the alphabet is one example you can use to work dual tasking. You might be surprised how challenging this is in the beginning. Changing variables to progress the athlete is the goal. Moving from stable to unstable surfaces, adding a second ball, or tasking the athlete with a more complicated verbal recital are a few ways to progress. Just remember to continue slowly progressing cardio during this time. Treating concussions can be a challenge without the right information. Fortunately, we have lots of information and research available to us as sport clinicians. Sideline coverage is a great way to start learning how to recognize the many different faces of concussions. Treatment will vary athlete to athlete but dual tasking can be a very effective way to rehabilitate these athletes. -Dr. Brian Schwabe, PT, DPT, SCS, COMT, CSCS Board Certified Sports Physical Therapist  The Clinical Practice Guidelines (CPG) have been developed over the last decade with the goal of summarizing best practice methods for various orthopaedic diagnoses. While the utility of CPG's may be debatable, they do an excellent job providing a summary of the evidence for managing the specific conditions. With the hip being the focus of December, I am going to review what the evidence shows for examining a patient with hip osteoarthritis and the appropriate interventions. Before getting started, a quick reminder for the grading system for research: A (strong evidence), B (moderate evidence), C (weak evidence), F (expert opinion).  Diagnosis (A): These patients are over the age of 50 and exhibit the following presentation (A-Level Evidence): -Moderate anterior or lateral hip pain with weight-bearing -Morning stiffness less than 1 hour after waking -Hip IR ROM < 24 deg or IR and Flexion < 15 deg compared to nonpainful side -Increased hip pain associated with passive hip IR Outcome Measures for Activity Limitation and Participation Restriction (A): -WOMAC -HOOS -LEFS -HHS Activity Limitation/Performance Measures (A): -6 Minute Walk Test -30 Second Chair Stand -Stair Measure -TUG Test -Self-Paced Walk -Timed SLS -4 Square Step Test -Step Test Balance Measures (A): -TUG Test -Berg Balance Test -Timed SLS Test Physical Impairment Measures (A): -FABER Test -Hip PROM -Hip Strength Testing As you can see, there are quite a few very reliable methods of diagnosing Hip OA and then tracking progress in function, balance, performance and impairment. It is in no way necessary to perform all of the above tests and measures. What I recommend from these is to identify your patient's goals and determine what outcome measures and performance measures will best track said progress. It is good to be thorough with the impairment measures in order to track objective changes. Once the patient has been diagnosed with Hip OA, there are several interventions that have shown varying levels of support. Interventions: -Education (B): activity modification, exercise, joint unloading, weight-loss -Functional Gait and Balance Training (C): gait/balance training and use of assistive device -Manual Therapy (A): thrust/non-thrust manipulation and STM and coupled with exercise -Flexibility/Strengthening/Endurance Exercises (A) -Modalities (B): US to ant/lat/post hip and coupled with exercises and heat -Bracing (F): should only be tried if exercise/manual therapy fail -Weight Loss (C)
As you can see, the typical trend for PT continues with treatment for this diagnosis: manual therapy and exercise have high level evidence. While education has moderate evidence, it would be interesting to see the benefit of education that was more focused on pain science, graded exposure, and cognitive behavioral therapy. These topics are more pertinent today given the findings of pain science research, especially given how frequently people have "Hip OA" and don't have any pain. Additionally, it was surprising to see that ultrasound had moderate evidence. Even so, I would recommend more focus be placed on exercise, education and manual therapy for these patients. As a whole, I think that the development of CPG's will help to improve the standard of care. There is far too much varied care due to misdiagnosis. That being said, patients don't present "standardized" and we are moving away from pathoanatomical diagnoses as well. Hip osteoarthritis is so common in people that it is almost surprising that it even has its own CPG. There are so many factors that go into a patient's pain and disability experience: financial situation, relationship stress, past experiences, fear, and more. No two patients present the same. I recommend take the recommendations from the CPG into consideration, but don't hesitate to modify your plan of care based on the patient presentation. -Dr. Chris Fox, PT, DPT, OCS
The Cervical Spine is Not Scary!The cervical spine is a sensitive region relative to other parts of the body; however, you should not be scared or less confident performing an evaluation in this region! When performing a cervical examination, it is important to assess for vertebral artery dysfunction, upper cervical instability, and other non-musculoskeletal pathology. Once you have cleared these regional red flags, proceed as you would with any examination. The KEY to creating a reliable cervical examination is to follow the same general steps for every new cervical evaluation you perform. These tests and measures are performed in a systematic, reproducible manner. While the clinician may add or remove testing as needed, the general framework for formulating their diagnosis is consistent. This consistency allows for efficiency and reproducibility. Cervical Examination Main Points
Cervical Examination Sequence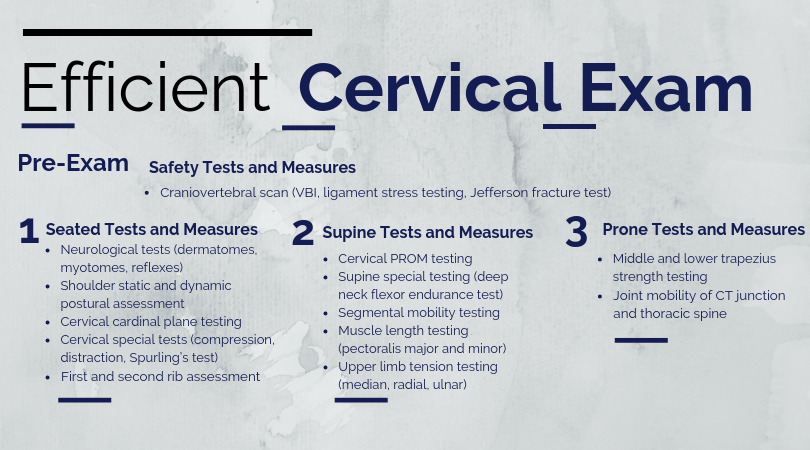 Cervical Day 1 Interventions (Post-Evaluation)Similar to my shoulder evaluation post and lumbar evaluation post, my Day 1 cervical interventions heavily focus on desensitizing the painful tissue through graded tissue exposure. Additionally, I spend a significant amount of time educating the patient on pain science and specific postures to temporarily limit due to pain. Cat/ CowCues and Main Focus Points
Thoracic Extension over Foam Roller Cues and Main Focus Points
Many physical therapists are hesitant to perform a cervical spine evaluation due to a lack of confidence. Do NOT be one of them! Practice and perform the mental repetitions required to consistent and confident during your cervical examination. -Jim Heafner PT, DPT, OCS
The temporomandibular joint (TMJ) is one of the least commonly treated regions of the body in outpatient orthopaedics. Due to this infrequency, many will therapists simply refer out to specialists when these patients present. Many are unaware of the fact that the TMJ and cervical spine are connected by more than just proximity. The spinal nucleus of the trigeminal nerve travels down into the upper cervical spine. Because of this relation, dysfunction (even if non-painful) in one can contribute to dysfunction in another. For this reason, among others the TMJ should be considered in management of cervical conditions and vice versa. 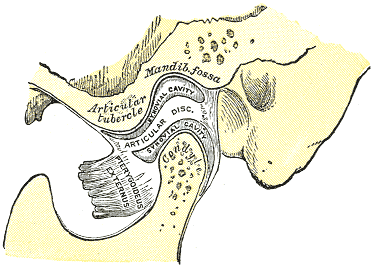 One general point to consider regarding TMJ arthrokinematics is that movement of the mandible requires motion in bilateral TMJ's. A restriction in one may force a relative hypermobility in the other. The arthrokinematics of the TMJ require both rotation and translation. Rotation occurs between the superior aspect of the mandibular condyle and the inferior articular disc. Translation occurs as the condyle and disc move on the mandibular fossa/articular eminence. Protrusion/Retrusion: Relative anterior/posterior translation of disc and condyle on mandibular fossa/articular eminence. The mandible and condyle follow the slope of the articular eminence during the motion, so during protrusion, the mandible slide anteriorly and inferiorly. The opposite is true for retrusion. Lateral Excursion: Side to side translation of the disc and condyle on the fossa. The ipsilateral condyle has minimal motion, while the contralateral condyle moves anteriorly and medially. The ipsilateral condyle almost acts as a pivot point. Depression: Made up of two phases. During the early phase (35-50%), the condyle rolls posteriorly on the inferior surface of the disc with slight anterior translation. During the late phase (final 50-65%), it transitions to motion primarily consisting of condyle and disc translating anteriorly on the mandibular fossa and articular eminence. The roll and translation occur with varying degrees but the disc stays between the condyle and eminence to minimize stress between the structures. Protrusion and depression are limited by retrodiskal laminae being stretched by attachment to the disc. Elevation: The opposite arthrokinematics of depression. Elevation is initiated by tension in the retrodiskal laminae.
When you are assessing an individual referred for TMD and cervicalgia, your examination should include both (along with the rest of the upper quarter). Some standard examination techniques include are ROM, resisted isometrics, segmental mobility, palpation, listening for joint sounds (disc displacement), cotton roll test, and posture. ROM of the TMJ can reveal potential limitations of the capsule. Normal ROM is: 45 mm for depression, lateral excursion is 1/4 of depression, protrusion is 6-9 mm and retrusion is 3 mm (Ho, 2011). Lateral deviation to one side may signify capsular restrictions ipsilaterally, potential muscle dysfunction, or an anteriorly displaced disc without reduction ipsilaterally. This may be represented as a "C-curve" when opening (an "S-curve" is associated with hypermobility). Resisted isometrics can help you to identify a particular muscle that is not functioning properly. Segmental mobility of both the TMJ and upper cervical spine can potentially assist in identifying hyper- or hypomobility in a segment related to the abnormal mechanics. Palpation can be useful for assessing trigger points or tenderness in a capsule. The cotton roll test can help differentiate between muscular and joint involvement. If a patient complains of pain when chewing on one side of the mouth, have the patient bite down on a cotton roll. By doing so, this gaps the ipsilateral TMJ. Thus, if pain is decreased, it would appear the pain is joint related, but if it doesn't change or increases, the pain is muscular (it is still possible that the pain is related to the cervical spine as well). Also, we cannot forget about the cervical posture. Knowing the resting position of the teeth is important to understand the individual's TMJ mechanics and as previously mentioned the impact cervical posture can have on the TMJ. Finally, be sure to check for any poor habits such as bruxism, chewing on ice, grinding teeth, etc. that impact the TMJ. There are three primary disorders of the temporomandibular joint. Anterior disc displacement with reduction occurs when the disc rests anterior to the condyle. During depression of the mandible, the disc slides into proper position throughout the motion, but as the mandible elevates it slides into its anterior position again. Both of these disc transitions typically are accompanied by a "click." Anterior disc displacement without reduction occurs when the disc rests anterior to the condyle but is unable to slide into proper position during jaw movements. There is typically no clicking occurring with this pathology and depression of the mandible is limited (blocking translation of the condyle). Posterior disc displacement occurs when the jaw has been held widely open for a prolonged period of time or extensive range and the disc gets "stuck" posterior to the condyle, blocking mandibular elevation. With reduction, a closing "click" may occur. While this article by no means serves as a "how-to" with managing the temporomandibular joint, it will hopefully help to understand the biomechanics of the TMJ and some general concepts regarding TMJ pathology. It is essential to at least consider assessing the TMJ in cervical patients, particularly if their progress is limited. Unfortunately, the research for TMJ management is rather limited at this time. -Dr. Chris Fox, PT, DPT, OCS Check out our Insider Access Page!
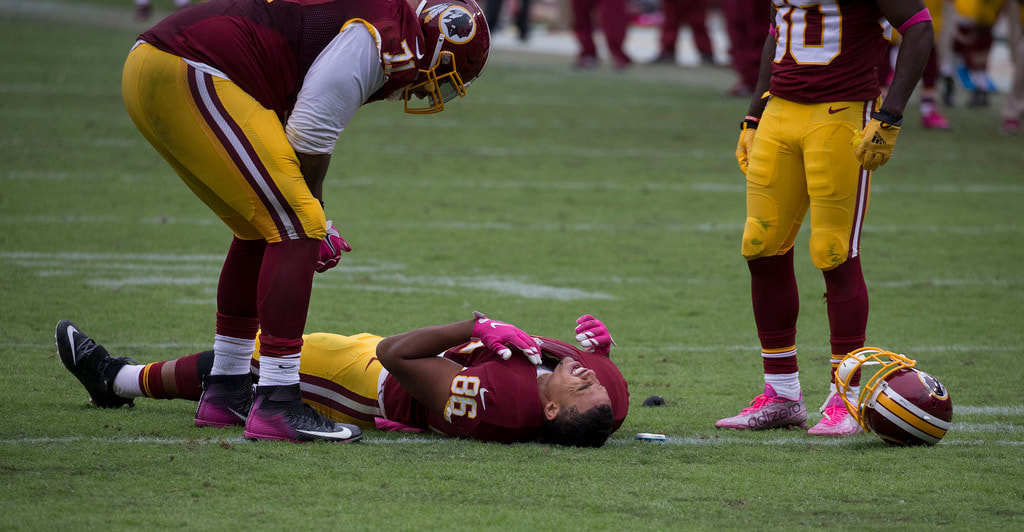
 Low back pain is one of the most prevalent “dx” physical therapists see across the board. So how does low back pain management change with athletes? In some ways it’s exactly the same and others completely different. The important thing is to pay attention to the big picture stuff so you don’t miss a major injury. Let’s talk about some of the major things we want to look out for and consider with the low back pain athlete. First of all, low back pain is not a normal finding. There is a reason the athlete is experiencing low back pain. For example, when I have a football lineman or gymnast come to me with low back pain my PT senses are automatically heightened. Why? Because these particular sports and positions are more predisposed to having a potential spondylolysis or spondylolisthesis. The reason being is the repetitive hyperextension and vertical loading required in these sports/positions. Therefore, part of my screening process is determining if I need to get these athletes imaging. From there, the management of these athletes with pars defects depend on the degree of slippage. For example, if an athlete has a lower grade slippage than often there is some period of activity restriction until pain subsides and then most importantly a gradual reloading with activity. Another diagnosis often seen is disc issues. These are more common than one would think and can be another injury that takes an athlete out for some time depending on the severity. Athletes that undergo more axial loading, flexion and rotation in addition to collision sports are often in the higher rate of athletes with lumbar disc herniations. One clinical pearl to offer is that sometimes when there is nerve involvement, the motor function is more affected than the sensory function. Therefore, just because an athlete doesn’t complain of the “common” tingling or numbness in the leg, doesn’t mean you should skip a myotomal exam. Return to sport following a low back injury in the athlete can be another challenge. While there is no “gold standard” return to sport testing for low back pain, plenty of data exists that athletes can return at a very high level following a low back injury (ex: Tiger Woods, Rob Gronkowski). Instead of the common algorithm like the knee has with hop tests (etc), the lower back is a little more multifactorial. However, similar principles apply. Return the athlete to his/her baseline function, clean up movement abnormalities, re-establish strength levels, and have a gradual return to sport with controlled to uncontrolled practices in the respective sport. There is no one way and we should not make it one way. Instead, understanding the needs analysis of the sport, position, and the athlete’s previous level of function should be our goal. Low back pain in athletes can be a challenging case to manage. While it starts with a very solid assessment, understanding the biomechanics and positional demands of the respective sport will guide your interventions and eventual return to sport. Make sure you understand each sport and position carefully. For more information on return to sport considerations in the athlete and specific progressions and regressions, check out our Insider Access. Dr. Brian Schwabe, PT, DPT, SCS, COMT, CSCS Board Certified Sports Physical Therapist Frustrated with tough patient cases? Can't afford a sports or orthopedic residency? Want more skills to advance your career? Check out our TSPT official courses! |


 |  |
If you are a new graduate, treating acute low back pain can be frightening. Often times, a patient arrives in agonizing pain with a limited ability to do any movement. In these moments, your standard examination is dismantled. The natural default mode is to start performing every lumbar spine test and measure you learned in Physical Therapy school. In these moments, you gather information without considering ‘why’ you chose to perform the test and 'how' the outcome would impact your overall plan of care. It is in these moments that you realize that the special tests are not very special. So what happens next!? The answer is a better, more efficient evaluation from the start!
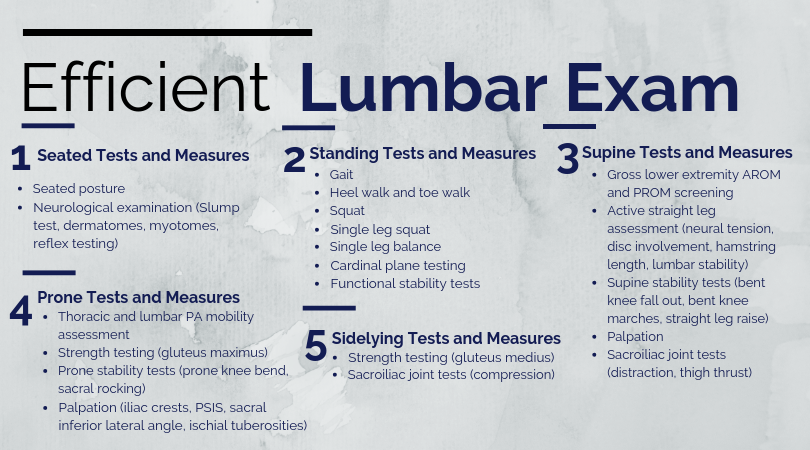
Key Lumbar Examination Points
- Minimal positional changes for the patient. It is inefficient to have the patient constantly rolling over, standing, and sitting. A patient in high levels of pain will not be able to tolerate multiple positional changes.
- Perform pain provocation testing last in each position. For example, if a patient states that bending forward increases their symptoms, perform lumbar flexion active range of motion last. Pain will cloud the results of your physical exam.
- Examiner must assess regional joints, muscles, and nervous system tissue. The body is a single kinetic chain. Movement at one joint increases the demands on local tissue. For example, when someone performs shoulder flexion, movement occurs in the thoracic spine, rib cage, acromioclavicular joint and more. If one of those areas is dysfunctional, it can be the source of pain. Each examination needs to evaluate each source of a patient’s symptoms.
Lumbar Examination: Efficiency and Reliability
A good clinician will follow the same general steps when performing any Physical Therapy Evaluation. These tests and measures are performed in a systematic, reproducible manner. While the clinician may add or remove testing as needed, the general framework for formulating their diagnosis is consistent. This consistency allows for efficiency and reproducibility. For example, in the lumbar evaluation the examiner assesses the function of the core muscles in supine; however this should only be completed after a thorough examination of the functional testing of the core in standing. It would not be an efficient use of time to take an acute low back pain patient from standing, to supine, back to standing, to prone. The entire session would be disrupted with positional changes. Additionally, the goal of any physical therapy session is to maximize the patient's functional ability so we must assess function first.
What is clinical efficiency?
 | AT IT'S CORE, CLINICAL EFFICIENCY IS ARRIVING AT THE CORRECT PHYSICAL THERAPY DIAGNOSIS AND DETERMINING THE APPROPRIATE PLAN OF CARE WITHOUT PERFORMING UNNECESSARY TESTS AND MEASURES. |
Lumbar Examination Sequence
Lumbar Interventions: Typical Day 1 Treatment and More
Similar to my shoulder evaluation post, my Day 1 lumbar interventions heavily focus on desensitizing the painful tissue through graded tissue exposure. Additionally, I spend a significant amount of time educating the patient on pain science.
Below are 3 common exercises I give patients on the first day
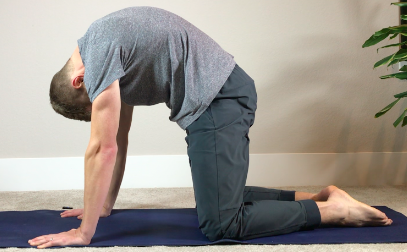
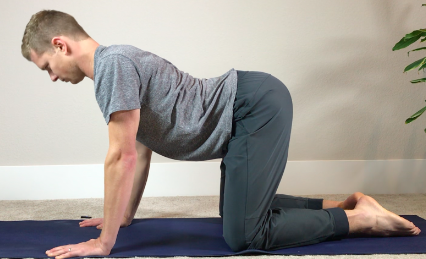
Hand Heel Rocks
General Cues
- Position yourself so that your hands are directly under your shoulders and knees are directly under your hips
- Rock backwards as far as you can before your lower back starts to round
- Make sure that your head does not start to look up or drop down and that your lower back does not round during the exercise
Supine Hip External Rotation
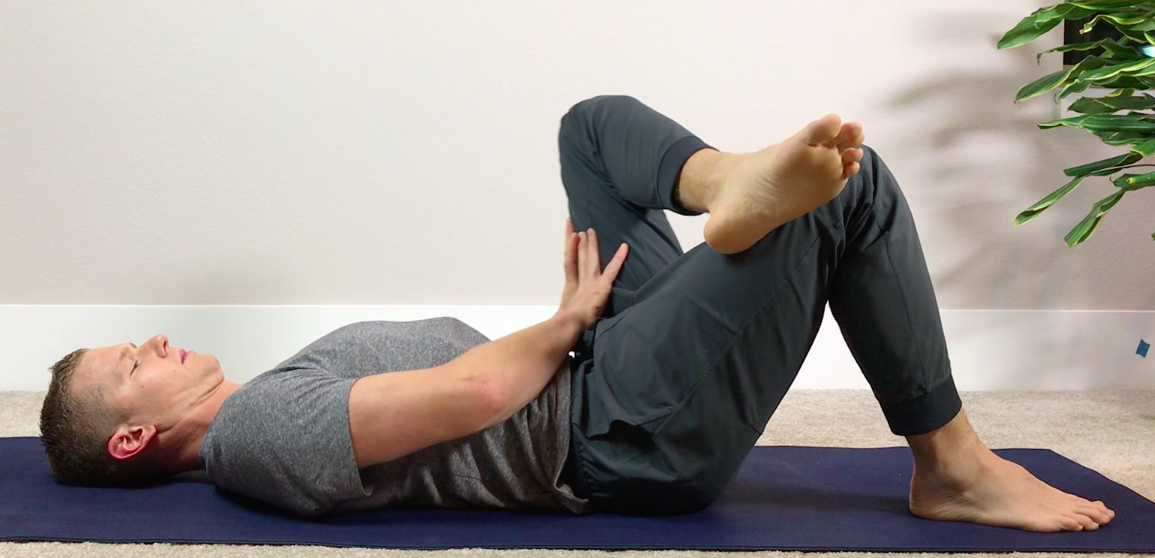
General Cues
- From a hooklying position, bring one leg over the top of the other
- Use your hands to press your thigh further into hip rotation
- Engage the lower abdominals to minimize movement from the low back (this movement is not bad, but just not the purpose of this exercise)
Prone Press-ups
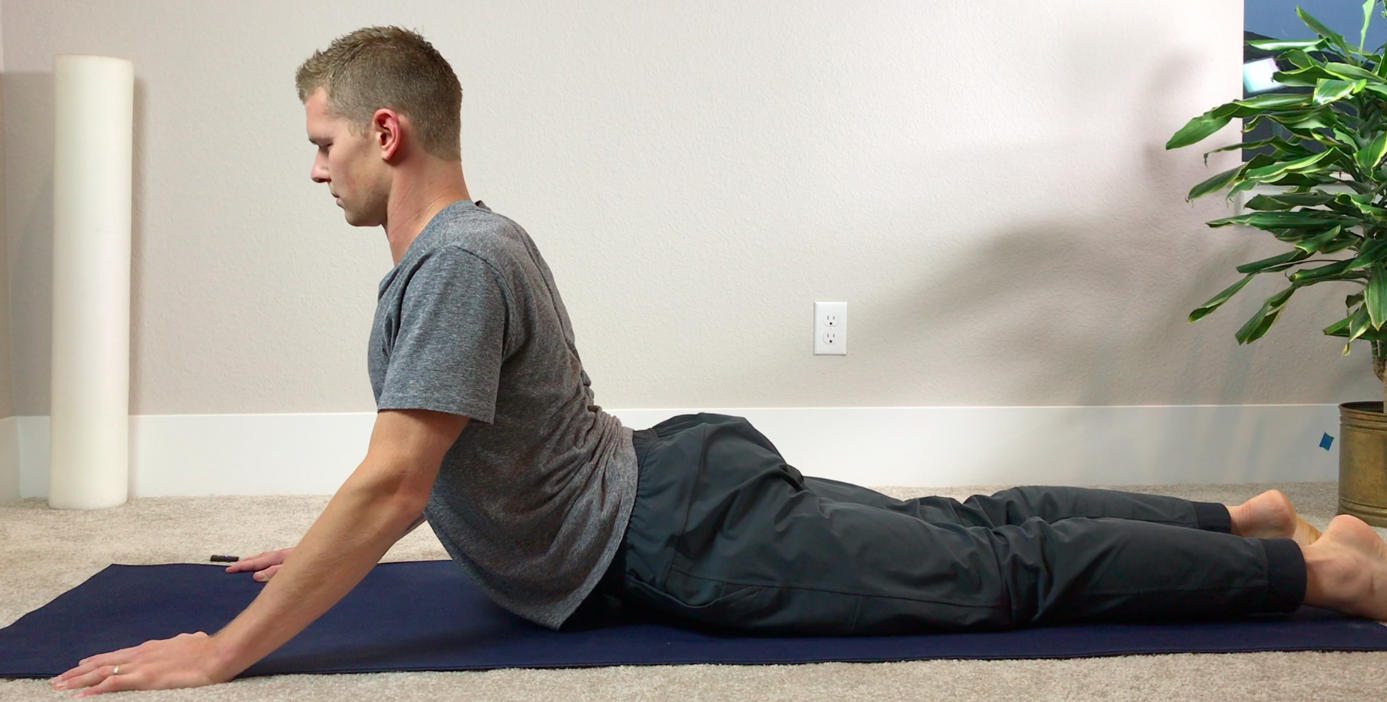
General Cues
- From your stomach, use your hands to press up into back extension
- Relax your glutes and low back to sink further into the movement
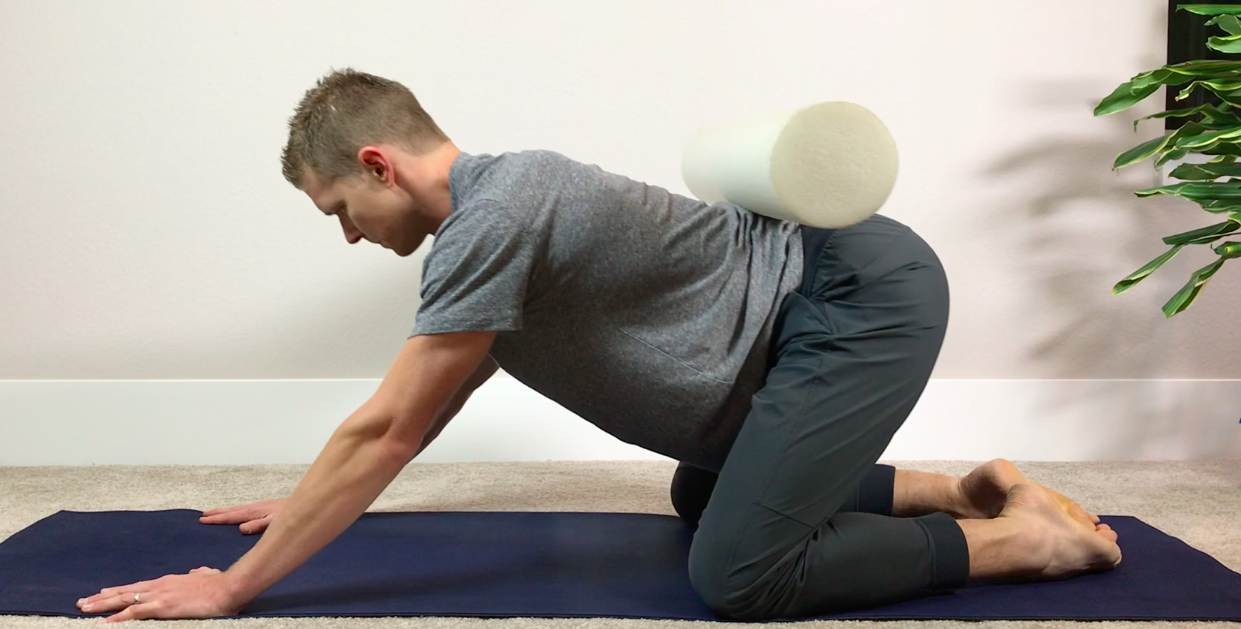
Bonus: Foam Roller Thoracic Extensions
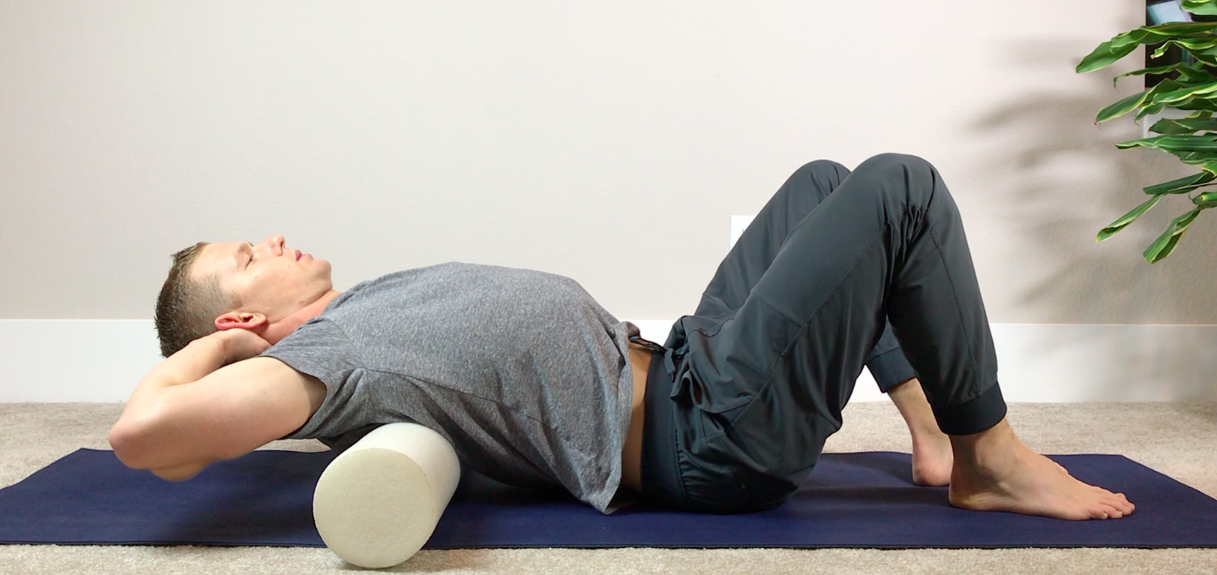
General Cues
- Place the foam roller across your middle back
- Arch over the foam roller while keeping the core engaged (this minimizes the movement across the low back-- important if they are in pain)
There are no single set of exercises for every patient. Their individualized pain triggers and tolerance to exercise will heavily dictate what they can do!
Jim Heafner PT, DPT, OCS
Jim Heafner PT, DPT, OCS
Check out our Insider Access Page!
| Learn from residency-trained, board-certified orthopaedic and sports physical therapists. With Insider Access, you gain access to advanced manual assessment and treatment techniques, exercise progressions, sports specific content, and more. Our goal is to facilitate your clinical and professional growth! |  |
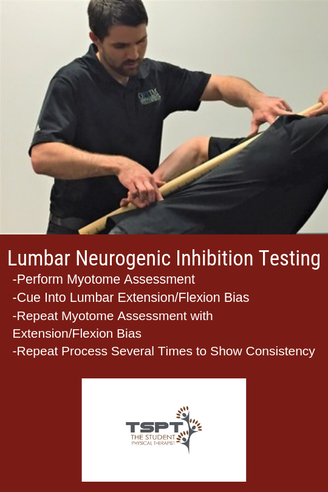
Last year I wrote an article about neurogenic inhibition testing. Neurogenic Inhibition is the concept that the muscle's ability to produce resistance and contractile force is limited by the neural input, not the true muscle strength. It is indicated when either a muscle became weaker with repetitive resistance testing or if the strength improved when resistance was gradually increased. In the past, I addressed these conditions with focusing on improving mobility along the path of the nerve and with strengthening the affected muscles.
About Neurogenic Inhibition
One of my favorite aspects of my fellowship mentoring hours is that my mentor has a different treatment style and background compared to me. My training is more in line with Optim Manual Therapy's Fellowship, while my mentor went through NAIOMT's Fellowship. His coursework put a greater emphasis on testing and treating Neurogenic Inhibition. To evaluate a patient for Neurogenic Inhibition, test a patient's muscle strength with a relaxed lumbar spine, then repeat the same testing with a PPT and APT. If the strength completely normalizes with a bias of the lumbar spine, it would be positive for Neurogenic Inhibition. NAIOMT's theory is that the affected segment is "unstable" in a certain direction (decreasing the signal from the nervous system) and the lumbar spine bias provides stability that improves the neural input. An example would be supine ankle DF strength testing that was 4/5, but with the extension bias to the lumbar spine immediately becomes 5/5. The opposite may apply as well. In that same example, the 4/5 ankle DF strength may become 3+/5 with a lumbar flexion bias. It is worth testing and re-testing.
One of my favorite aspects of my fellowship mentoring hours is that my mentor has a different treatment style and background compared to me. My training is more in line with Optim Manual Therapy's Fellowship, while my mentor went through NAIOMT's Fellowship. His coursework put a greater emphasis on testing and treating Neurogenic Inhibition. To evaluate a patient for Neurogenic Inhibition, test a patient's muscle strength with a relaxed lumbar spine, then repeat the same testing with a PPT and APT. If the strength completely normalizes with a bias of the lumbar spine, it would be positive for Neurogenic Inhibition. NAIOMT's theory is that the affected segment is "unstable" in a certain direction (decreasing the signal from the nervous system) and the lumbar spine bias provides stability that improves the neural input. An example would be supine ankle DF strength testing that was 4/5, but with the extension bias to the lumbar spine immediately becomes 5/5. The opposite may apply as well. In that same example, the 4/5 ankle DF strength may become 3+/5 with a lumbar flexion bias. It is worth testing and re-testing.
Free Preview of Insider Access!
I'm not saying that I agree with the theory, or that there is even any research to support this assessment method; however, I have noted regularly that strength changes can occur with changes in spinal positioning. The method that my mentor treats these cases is that he works on increasing strength and activation of the spine in the deficient region and then supplementing that activity with exercises that work the affected myotomal levels. For example, I evaluated a patient this past week that had 4-/5 strength of his R glutes, ankle DF and ankle eversion, all of which became 5/5 with lumbar bias into extension (complaints of drop foot for 4 years after cervical spine surgery). Some exercises we went over included ones that bias the lumbar spine into extension (APT) and work the glutes, toe extensors, and ankle eversion.
Proposed Theories
It may be that the patients improve because of increased "stability" in the dysfunctional direction, it may instead be due to improving mobility in the dysfunctional direction, or it may be something else altogether. However, because there is so little research in the area, we don't even know how effective the method is in the long-term; however, it is worth exploring due to the immediate changes that can occur. I like to implement Neurogenic Inhibition Testing to help direct my treatment direction. I have found that this same assessment method tells me which direction a patient may respond to repeated motions. Using the same previous example, if the strength improves with lumbar extension bias, I would have the patient perform repeated lumbar extensions (or a variation of it) and recheck the strength. In most cases, the strength is improved afterwards without doing the same biasing. In fact, the patient I described came back from the evaluation with a HEP of press-ups with a R bias and his ankle DF/eversion and hip abduction strength were all 4+/5 without any lumbar spine bias. It is far too early to tell if any long-term or practical changes will occur however the testing may still play a role. It can be useful when a patient is so acute that they may not be ready for a full repeated motions assessment. In general, my treatment method is going to stay the same as discussed in the previous article: improve mobility of the nervous system along the entire path, wherever restricted, and strengthen the affected muscles. I may get there differently with this alternative testing method and I may incorporate some of the treatment theories as well.
-Dr. Chris Fox, PT, DPT, OCS
See More from The Student Physical Therapist
"I was confronted with the ethical dilemma, do I tell him his ACL is likely torn or not."
I was recently working with a 16 year old, active young man who injured his knee while playing rugby 6 days prior. During the initial evaluation, he reported quickly decelerating on the field while pivoting his body. He only had minimal pain, and his swelling was quickly improving with each day following his injury. Additionally, he had a rugby tournament overseas in 2 weeks that he needed to be in good athletic condition to play.
As I continued to the examination, I performed the Lachman's Test, which was positive, as well as a positive Anterior Drawer Test. Despite the positive finding, he denied any buckling, locking, or catching. His clinical examination was negative for meniscal pathology and other ligament insufficiency. At this point, I was confronted with the ethical dilemma: Do I tell him his ACL is likely torn or not? On one hand he was making good progress with rest and gradual return to activity. Would the diagnosis of a torn ACL create thought viruses that would hinder his progress with conservative treatment? On the other hand, if he had a torn ACL, does he potentially have other associated injuries? Segund fractures are present in 75-100% of ACL tears. Lateral meniscus tears occur in 54% of acute ACL injuries.
 | Ethical DecisionAs the patient, he had the right to know my clinical findings. I told him his mechanism of injury and clinical presentation are consistent with an ACL tear. Additionally, I educated him and his mother on the treatment options, copers vs. non-copers, risk of future injuries, and risks of surgery. The family made the decision to see an orthopedic specialist, who ordered an MRI. The MRI identified a fully torn anterior cruciate ligament and bucket handle tear of his medial meniscus. |
"The MRI identified a fully torn anterior cruciate ligament and bucket handle tear of his medial meniscus."
The following week, he travelled with his rugby team and played in several matches. Upon his surgeon's recommendation, he would have surgery after the tournament to reconstruct his ACL and repair the meniscal tear. In this case, should surgery have been avoided? Was his ACL surgery really necessary?
Is ACL Surgery Really Necessary?
For many many, a torn ACL was synonymous with surgery. However recently, the optimal management of ACL injuries has been placed under question. Recent research, 'A Randomized Trial of Treatment for Acute Anterior Cruciate Ligament Tears,' identified that ACL reconstructive surgery was NOT superior to conservative management of ACL tears in young active adults. A second study by Meuffels et al, found similar outcomes between surgical and non-surgical groups at 10-year follow. The authors concluded, "we found no statistical difference between the patients treated conservatively or operatively with respect to osteoarthritis or meniscal lesions of the knee, as well as activity level, objective and subjective functional outcome."
If the outcomes are similar, why are surgeons still being performed at an alarming rate? As with most questions in physical therapy, the answer depends on a variety of factors. Clinically, I try to identify if the patient is a 'coper' or a 'non-coper.' Copers are individuals who can function at their desired level despite having a torn ACL. Non-copers are individuals who are unable to function at their prior level following an ACL injury. Copers will demonstrate good quadriceps strength, no buckling or giving way in their knee, and strong, pain free hop tests following conservative rehabilitation. Non-copers will continue to have giving way of their knee, pain that limits function, and subjective reports of decreased quality of life. Regardless, whether someone is a coper or non-coper, it is important to educate them on the pro's and con's of both surgery and rehab.
Final Thoughts
As research continues to develop, we know at least one thing, the ACL is not vital for stability of the knee. Complications and risks will exist on either side of the equation. Patients can have success with both rehab and surgery. The job of a good physical therapist is to present the best available evidence and guide the patient in deciding which treatment option is MOST appropriate for them.
-Jim Heafner PT, DPT, OCS
-Jim Heafner PT, DPT, OCS
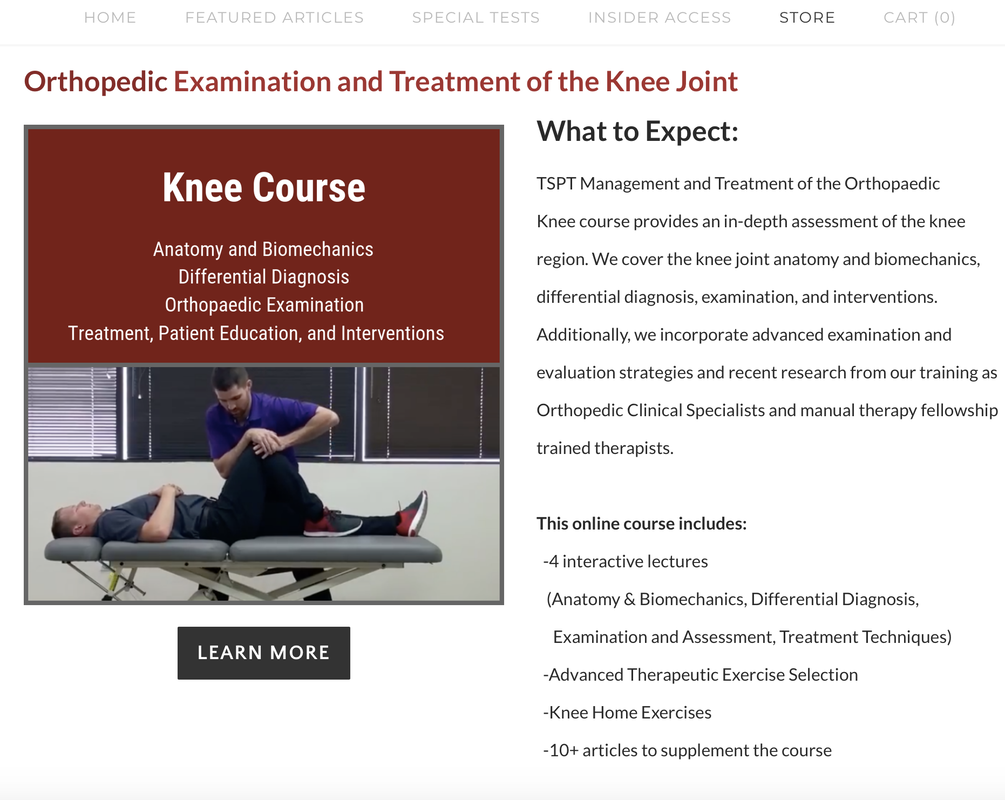
Check out TSPTs NEW Knee Course!
Save $10.00 using the promo code: ACLrehab
Our Insider Access Library is Growing!
 | What you get with Insider Access -Over 80 videos including 3 new videos every month -Residency level education from Board Certified Orthopedic and Sports Physical Therapists -Advanced Manual Therapy Techniques with details and descriptions from Certified Orthopedic Manual Therapists -Return to Sport Testing and Suggested Sequencing -Eclectic approaches to assessment and treatment -Sport specific assessments for individual sports |
References:
1. Frobell RB, Roos EM, Roos HP, Ranstam J, Lohmander LS. A randomized trial of treatment for acute anterior cruciate ligament tears. N Engl J Med2010;363:331-42.
2. Meuffels DE, Favejee MM, Vissers MM, Heijboer MP, Reijman M, Verhaar JA. Ten year follow-up study comparing conservative versus operative treatment of anterior cruciate ligament ruptures: a matched-pair analysis of high level athletes. Br J Sports Med2009;43:347-51.
Did the title of this post catch your eye? Articles with similar titles have caught my eye for years in my quest to understand proper sports rehabilitation and return to sport. Yet, despite completing a sports physical therapy residency with USC in 2014 and becoming a board certified sports physical therapist, I still find myself searching for more answers every day. I end up with more questions most of the time (which I think means I’m on the right track?).
Regardless of my current quest to continue to improve my knowledge and ultimately application of knowledge in return to sport, there are a few things I have learned that are worth sharing. Return to sport is a big buzz word and I feel confident saying that not one person has all the answers. I’ve been lucky to be in a residency class that boasts two NFL physical therapists (Rams & Eagles) and every conversation I’ve had with them (in the past and recently) demonstrates to me that they too are constantly searching for ways to improve these processes. Which is pretty crazy because they have great track records.
My interest in ACL return to sport stems from my love for basketball and my years of special interest in treating the basketball athlete. Unfortunately, too many basketball players suffer from ACL injuries. This sparked my interest in understanding why this happens, how we can better prepare these athletes (prevention), and what we can do to successfully return them to sport at the highest level. I say return to sport at the highest level because too often I see players return to practice level but not full game level.
Currently, literature has focused on more objective criteria and milestones based progressions. However, as we know, it does take the literature time to catch up to what we see anecdotally. Functional tests are good but do not take into consideration reactive measures. I find myself using these tests but often adding in different movement testing with reactive components to try to mimic sports. After all, almost all movements in sports are unplanned. Training our athletes during their rehab or injury prevention in reactive environments can be very useful.
How can we start to train “reactive” components? I find it best not to overthink this and I often use auditory commands or visual commands. For example, when training a basketball player with shuffling in a defensive stance, I will say “Right!” or “Backwards!” or “Left!” continuously for a specified time to signal to the player to shuffle in that particular direction. Using your hands to point in specific directions is another way to do it by challenging a different sensory input. Lastly, using props such as a foam roller, tennis ball, basketball, etc to throw or drop it in a particular direction can be very effective in training reactive first steps. It’s important to note that I often like to record these drills to look at movement both in the moment and afterwards to see what I missed with their preferred movement strategies.
ACL return to sport needs to be a multifactorial approach. As this literature article suggests, there are many ways to start preparing our athletes for their eventual return to sport. Understanding the particular athletes sport is something that is also absolutely crucial. Adding psychosocial components, fatigue testing, reactive testing, and sport specific movement based testing is just as important. If you have ACL athletes and do not understand the biomechanics of their sport, take a look through the literature and check out our resources here and here. Most importantly, continue to ask questions to yourself with each athlete you have to find continued ways to improve their outcomes.
Dr. Brian Schwabe, PT, DPT, SCS, COMT, CSCS
Board Certified Sports Physical Therapist

Dr. Brian Schwabe's NEW Book in partner with PaleoHacks!

Learn residency-level content on our
Insider Access pages
Insider Access pages


We value quality PT education & CEU's. Click the MedBridge logo below for TSPT savings!
Archives
July 2019
June 2019
May 2019
March 2019
February 2019
January 2019
December 2018
November 2018
October 2018
September 2018
August 2018
July 2018
June 2018
May 2018
April 2018
March 2018
February 2018
January 2018
December 2017
November 2017
October 2017
September 2017
August 2017
July 2017
June 2017
May 2017
April 2017
March 2017
February 2017
January 2017
December 2016
November 2016
October 2016
September 2016
August 2016
July 2016
June 2016
May 2016
April 2016
March 2016
February 2016
January 2016
December 2015
November 2015
October 2015
September 2015
August 2015
July 2015
June 2015
May 2015
April 2015
March 2015
February 2015
January 2015
December 2014
November 2014
October 2014
September 2014
August 2014
July 2014
June 2014
May 2014
April 2014
March 2014
February 2014
January 2014
December 2013
November 2013
October 2013
September 2013
August 2013
July 2013
June 2013
May 2013
April 2013
March 2013
February 2013
January 2013
December 2012
November 2012
October 2012
September 2012
August 2012
Categories
All
Chest
Core Muscle
Elbow
Foot
Foot And Ankle
Hip
Knee
Manual Therapy
Modalities
Motivation
Neck
Neural Tension
Other
Research
Research Article
Shoulder
Sij
Spine
Sports
Therapeutic Exercise
 RSS Feed